
Summary
Based on the characteristics discussed above, Table 2 shows the author’s review and conclusions of using a range of cannulae when working on different anatomical regions of the body and face.
The most reliable are those cannulae that have the side ports located near to their tips (e.g. Silkann, Mesotech and STERiGLIDE), as no breakages have been experienced in the author’s practice. Cannulae by Dispoderm and SoftFil come with the side port located far from the tip, and the author must admit that a number of cases of breakages at the tip were observed when using these devices.
When using the thinner cannulae, such as the 27 G and especially the 30 G, special care should be taken in order to avoid breakages not only at the tip, but also at the base of cannula.
The Dispoderm cannulae do not come equipped with introducer needles, while Silkann, SoftFil, Magic Needle, Mesotech, and STERiGLIDE are equipped with introducer needles. It is important to note that the SoftFil cannulae are equipped with a needle of the same diameter as the cannula itself: if the skin has retained even a little of its elasticity, it will contract after the introducer needle has been inserted, which makes it rather difficult to introduce the cannula into the smaller opening.
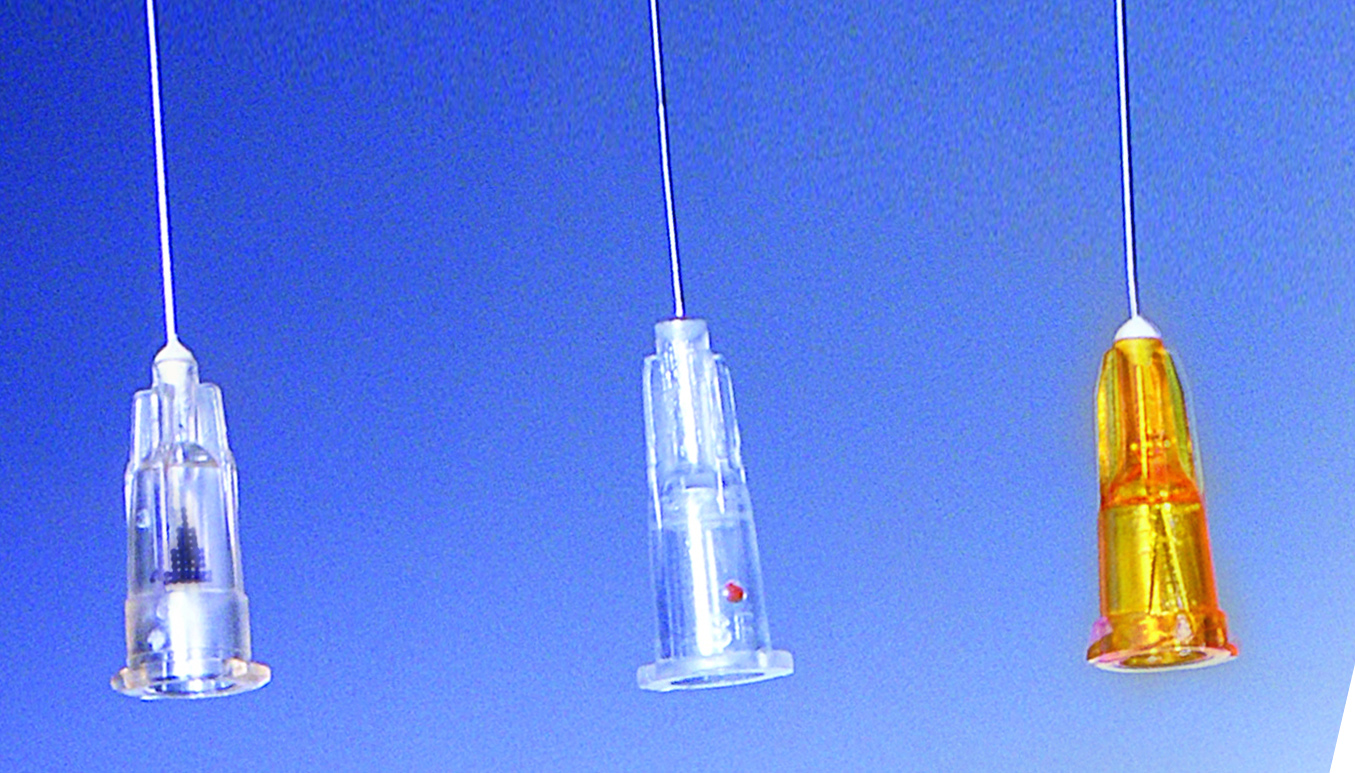
Position of the side port on the hub: (Left) STERiGLIDE; (Middle) SoftFil Precision; (Right) Silkann cannula. (NB. The more recent models of the Silkann cannulae come with the side ports emphasised in black)
Silkann, Magic Needle, Mesotech, and STERiGLIDE cannulae feature convenient bundling: the gauge of introducer needle is larger than that of the cannula (e.g. the 27 G cannula comes with a 25 G needle, which proves to be convenient bundling).
The author found the Silkann cannulae to be too ‘soft’ and after being inserted into tissue, could be bent when changing the insertion trajectory. The smooth texture of the protective caps of Dispoderm and Silkann cannulae can put the physician at an additional disadvantage while carrying out procedures, in contrast with the ribbed caps of Needleflex and STERiGLIDE.
In the author’s experience, the most universal cannulae are 27 G and 25 G, with a length of 38–50 mm. These sizes are convenient and easy to use with any products and on any anatomical region.
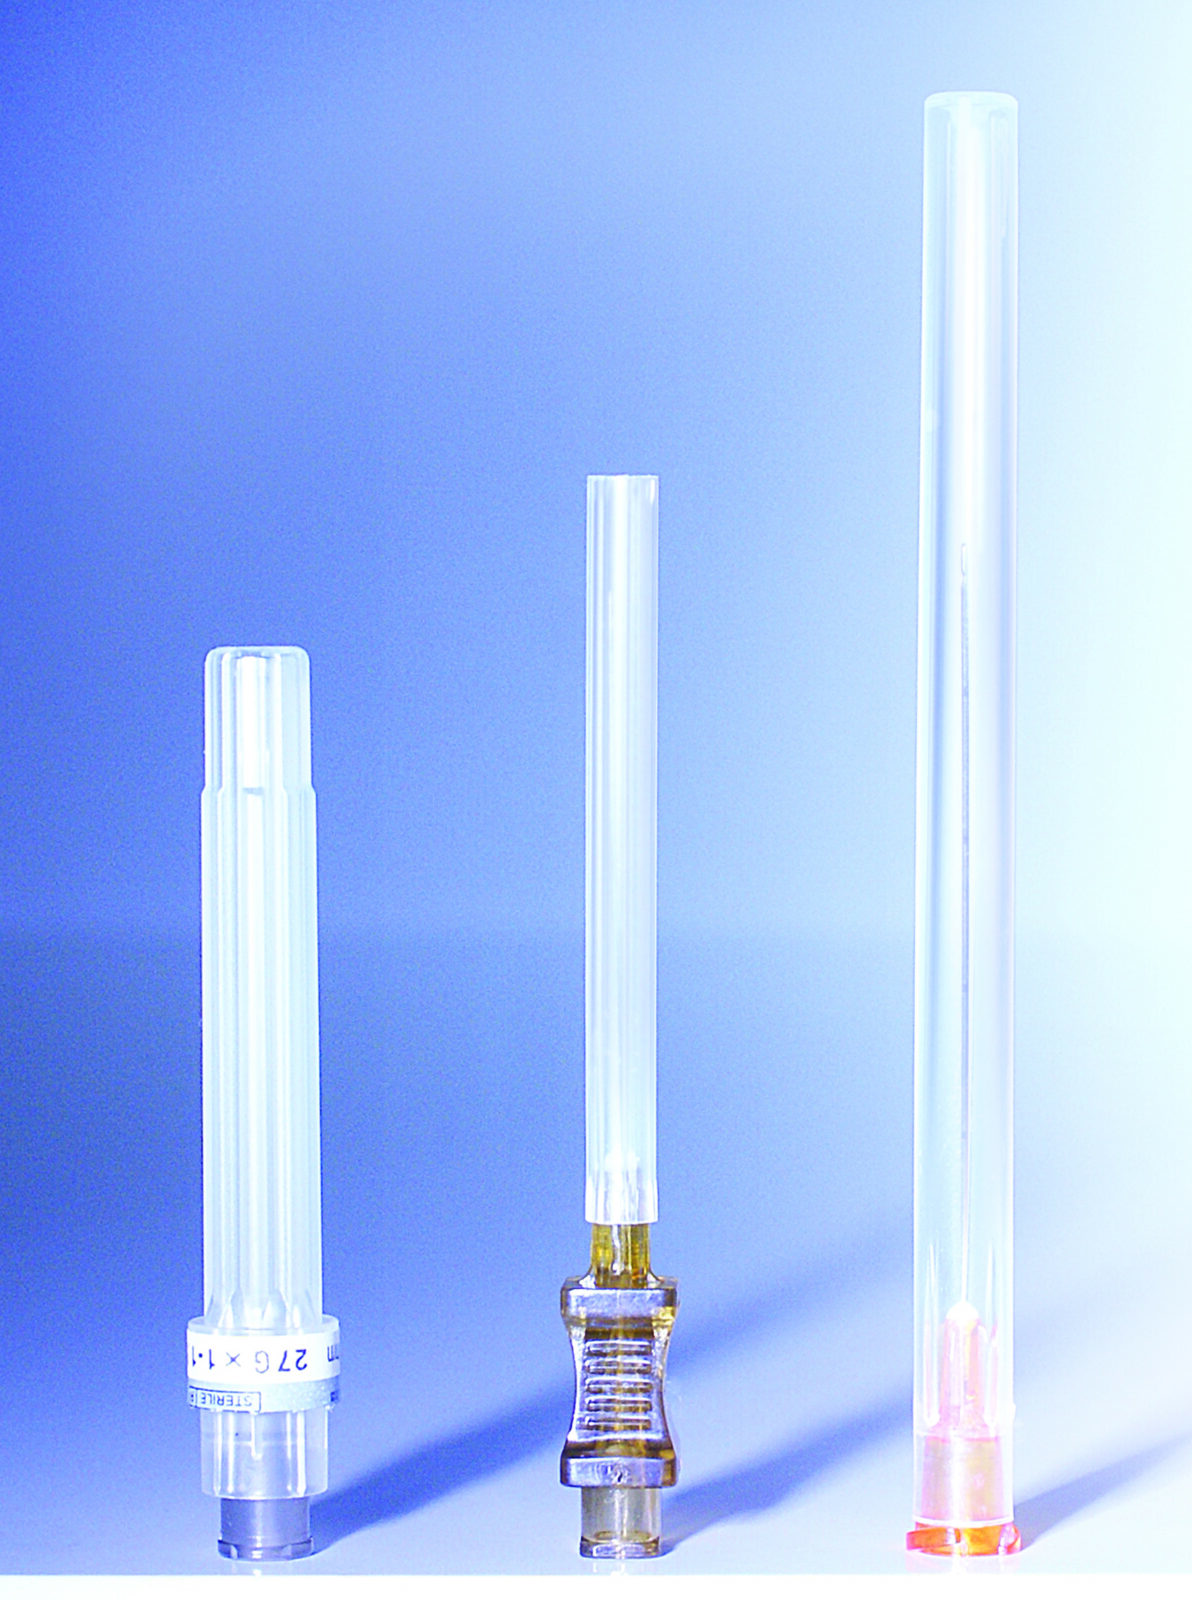
Figure 5 Comparison of the textures. Ribbed cap (Left) STERiGLIDE versus smooth cap
(Middle) Dispoderm, (Right) Silkann
Practical recommendations for the safe application of cannulae
Once the right cannula is chosen, there comes the technique of applying it to treatment. When one begins working with cannulae, one may feel a feeling of euphoria — a sense that carrying out injections has become easy and simple. Only after working with cannulae for some time, one starts seeing the ‘pitfalls’. Surely the main concern is the prevention of infectious complications. Below are three important steps to apply the correct technique when using cannulae for rejuvenation procedures with non-cross-linked HA and/or PRP.
Step 1: disinfection
The entire anatomical region (face, neck, chin, décolleté, hands, etc.) must be disinfected, and not just the area of injection itself. It is possible to use alcohol, alcohol-based solutions or chlorhexidine — the combination of two may yield slightly better sterility16. The author chooses to disinfect the skin surface twice with a 70% alcohol solution. Aseptic and antiseptic measures must be kept in mind throughout the entire procedure. Before and after each withdrawal of a cannula from the working channel, the cannula is wiped with chlorhexidine and a sterile saline solution. Then the cannula is placed on a sterile napkin (on a sterilised tray) to be covered. During the procedure, the area of injection should continually be wiped and covered with a cloth moistened with chlorhexidine and all injection points of cannulae should be treated with OPSITE Spray (transparent film dressing spray). Therefore, it is best to have an assistant when performing the treatment.
Step 2: anaesthesia
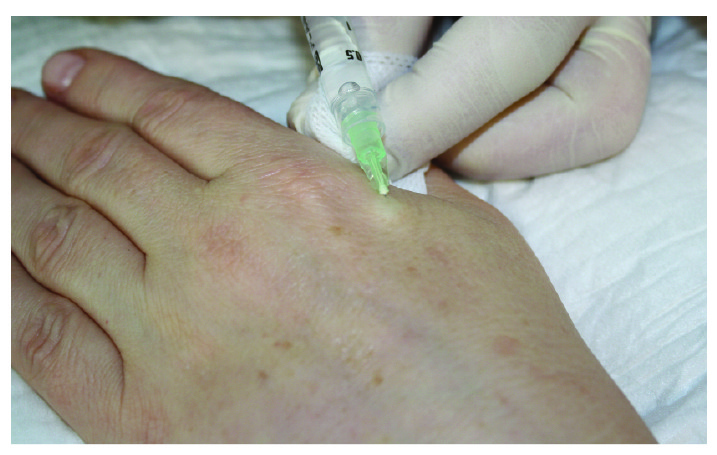
Figure 6 Infiltration anaesthesia of the cannula’s injection point as part of a procedure to rejuvenate the hands
Some physicians, before piercing the skin with the introducer needle, conduct infiltration anaesthesia of the cannula’s injection point17–19. The author, however, applies 0.3% of Ubistesin forte (articaine and adrenaline), which is administered using a 32 G x 4 mm needle in the quantity of 0.05–0.1 ml (Figure 6). This makes insertion of the cannula entirely painless and the use of adrenaline reduces the possibility of microhaematoma at the cannula’s injection point. It is best to leave the needle in the skin to mark the injection opening. Some physicians recommend adding anaesthetic into the syringe8, 20–22. Personally, the author prefers to add 0.1 ml of 4% Ubistesin forte directly into the syringe containing a product, thus painlessly enhancing the comfort of the rejuvenation procedure.
Step 3: introducing the cannula
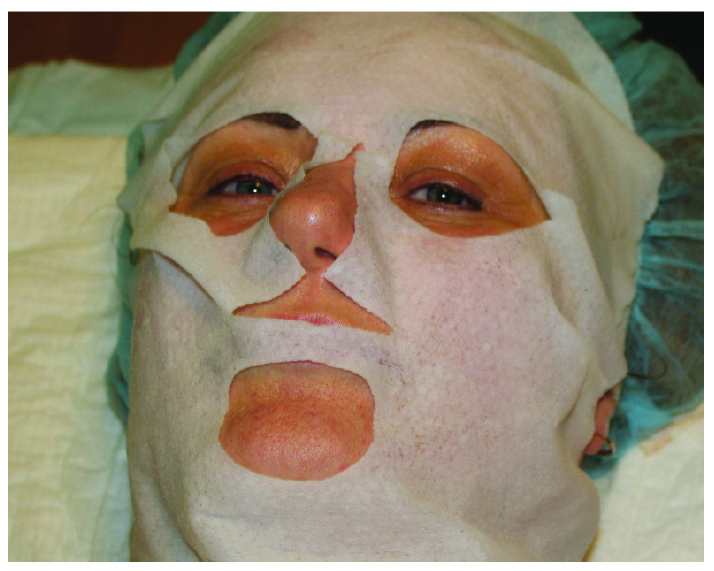
Figure 7 On completion of the rejuvenation treatment, the author lays a mask or cloth soaked in chlorhexidine on all treated areas for 5 minutes
The cannula should be introduced slowly along with the anterograde administration of a small amount of the product (hydrodissection), which will infiltrate the anaesthesia and help to prevent bruising after the procedure. Then one may work more freely, introducing separation or simply a radial retrograde administration of the bulk of the product. If any resistance is felt when moving the cannula, it should not be overcome with force, but rather, be rotated gently, allowing the cannula to ‘find its way’. After the cannula is removed, the insertion point and work areas are covered with a cloth moistened with chlorhexidine (because alcohol irritates a damaged skin), the treatment proceeds to the next insertion point. On completion of the rejuvenation treatment, a mask or cloth soaked in chlorhexidine should be laid on all treated areas for 5 minutes (Figure 7). Before and after treatment results can be seen in Figures 8–10.